Quick start
In Locust you define your user behaviour in Python code. You then use the locust command and (optionally)
its web interface to spawn and simulate a number of those users while gathering request statistics.
Example locustfile.py
import time
from locust import HttpUser, task, between

class QuickstartUser(HttpUser):
    wait_time = between(1, 2.5)

    @task
    def hello_world(self):
        self.client.get("/hello")
        self.client.get("/world")

    @task(3)
    def view_items(self):
        for item_id in range(10):
            self.client.get(f"/item?id={item_id}", name="/item")
            time.sleep(1)

    def on_start(self):
        self.client.post("/login", json={"username":"foo", "password":"bar"})
Let’s break it down
import time
from locust import HttpUser, task, between
A locust file is just a normal Python module, it can import code from other files or packages.
class QuickstartUser(HttpUser):
Here we define a class for the users that we will be simulating. It inherits from
HttpUser which gives each user a client attribute,
which is an instance of HttpSession, that
can be used to make HTTP requests to the target system that we want to load test. When a test starts,
locust will create an instance of this class for every user that it simulates, and each of these
users will start running within their own green gevent thread.
wait_time = between(1, 2.5)
Our class defines a wait_time that will make the simulated users wait between 1 and 2.5 seconds after each task (see below)
is executed. For more info see wait_time attribute.
@task
def hello_world(self):
    ...
Methods decorated with @task are the core of your locust file. For every running user,
Locust creates a greenlet (micro-thread), that will call those methods.
@task
def hello_world(self):
    self.client.get("/hello")
    self.client.get("/world")

@task(3)
def view_items(self):
...
We’ve declared two tasks by decorating two methods with @task, one of which has been given a higher weight (3).
When our QuickstartUser runs it’ll pick one of the declared tasks - in this case either hello_world or
view_items - and execute it. Tasks are picked at random, but you can give them different weighting. The above
configuration will make Locust three times more likely to pick view_items than hello_world. When a task has
finished executing, the User will then sleep during it’s wait time (in this case between 1 and 2.5 seconds).
After it’s wait time it’ll pick a new task and keep repeating that.
Note that only methods decorated with @task will be picked, so you can define your own internal helper methods any way you like.
self.client.get("/hello")
The self.client attribute makes it possible to make HTTP calls that will be logged by Locust. For information on how
to make other kinds of requests, validate the response, etc, see
Using the HTTP Client.
@task(3)
def view_items(self):
    for item_id in range(10)
        self.client.get(f"/item?id={item_id}", name="/item")
        time.sleep(1)
In the view_items task we load 10 different URLs by using a variable query parameter.
In order to not get 10 separate entries in Locust’s statistics - since the stats is grouped on the URL - we use
the name parameter to group all those requests under an entry named "/item" instead.
def on_start(self):
    self.client.post("/login", json={"username":"foo", "password":"bar"})
Additionally we’ve declared an on_start method. A method with this name will be called for each simulated user when they start. For more info see on_start and on_stop methods.
Start Locust
Put the above code in a file named locustfile.py in your current directory and run:
$ locust
If your Locust file is located somewhere else, you can specify it using -f
$ locust -f locust_files/my_locust_file.py
Note
To see all available options type: locust --help or check Configuration
Locust’s web interface
Once you’ve started Locust using one of the above command lines, you should open up a browser and point it to http://127.0.0.1:8089. Then you should be greeted with something like this:
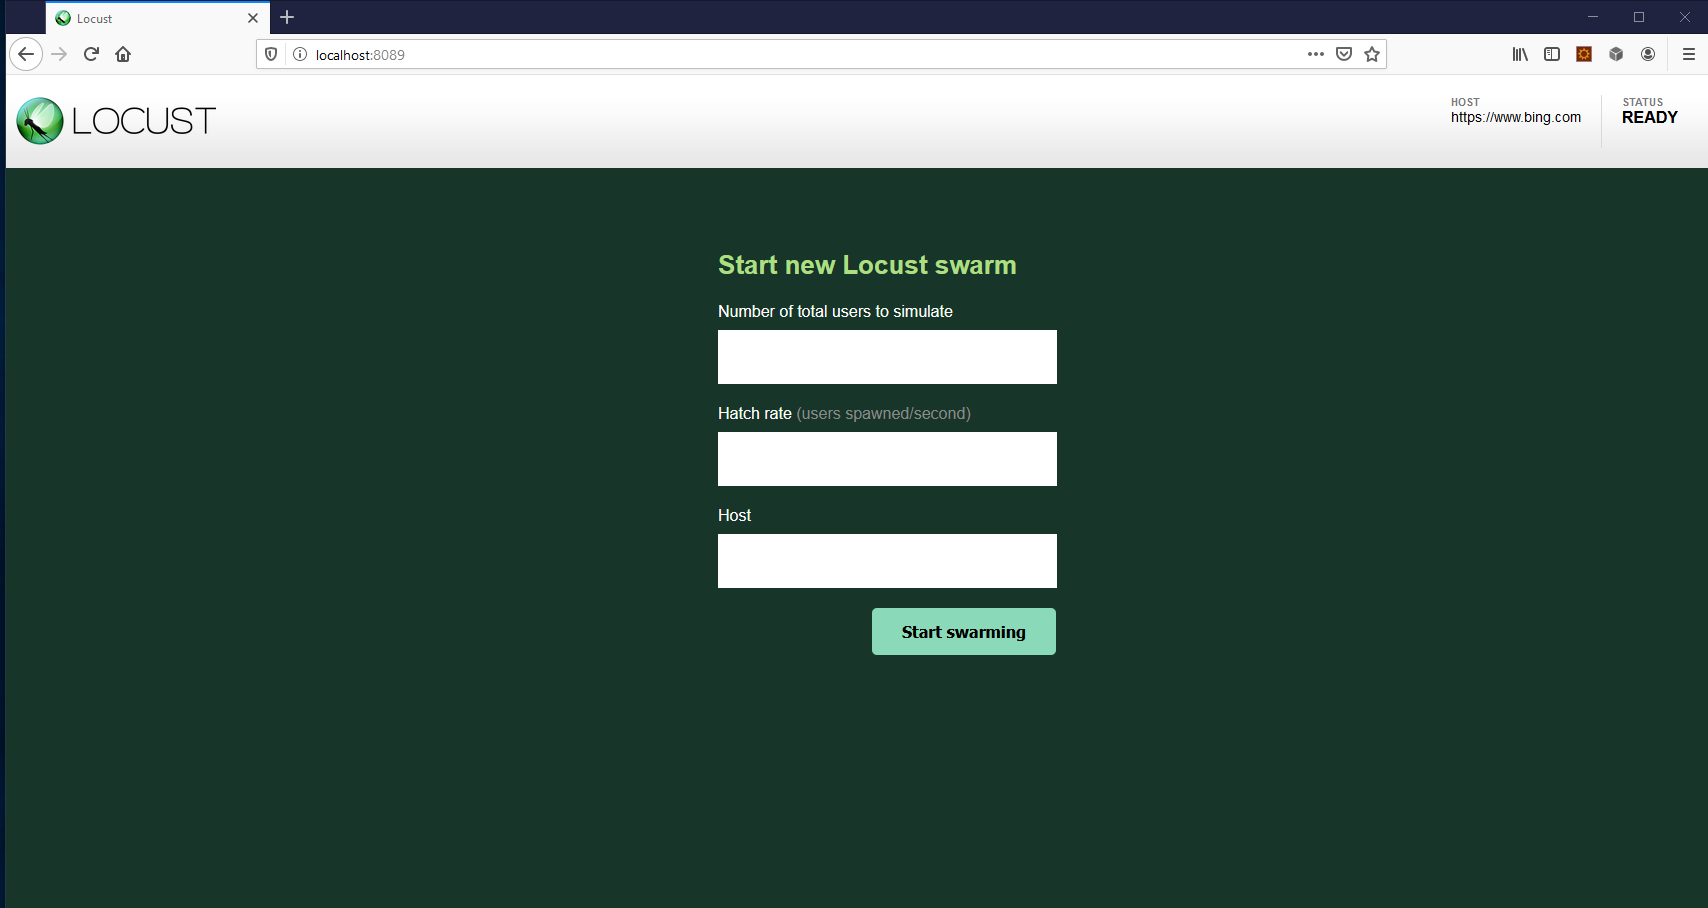
Fill out the form and try it out! (but note that if you don’t change your locust file to match your actual target system you’ll mostly get error responses)
More options
To run Locust distributed across multiple Python processes or machines, you can start a single Locust master process
with the --master command line parameter, and then any number of Locust worker processes using the --worker
command line parameter. See Running Locust distributed for more info.
To start tests directly, without using the web interface, use --headless.
Parameters can also be set through environment variables, or in a config file.
To add/remove users during a headless run press w or W (1, 10) to spawn users and s or S to stop(1, 10).
How to write a real locust file?
The above example was just a small introduction, see Writing a locustfile for more info.